Making a Photo Book in Apple Aperture
Despite the fact that Apple has ceased development of it’s pro photo application Aperture lots of photographers still use it. In fact, we’ve gotten a flurry of inquiries recently about printing photo books from Aperture. Here’s a step-by-step guide to creating a photo book in Apple Aperture and producing a print PDF to send to a book printer like Bookmobile.
The initial creation of a photo book in Aperture is quite straightforward. Here’s how:
- Gather the photos you want to use in the book in an Album. (In Aperture, Albums are ways to collect photos together for editing or other purposes.)
- Select the new Album, and click the browser view icon, which displays all the photos in the album in a matrix.
- Select all the photos. The keyboard shortcut is the usual Mac one: Command-A.
- On the menu bar, select File/New/Book. A popup menu appears.
- In the popup menu, select one of four standard sizes or create a custom size by selecting Custom in the Book Type dropdown menu.
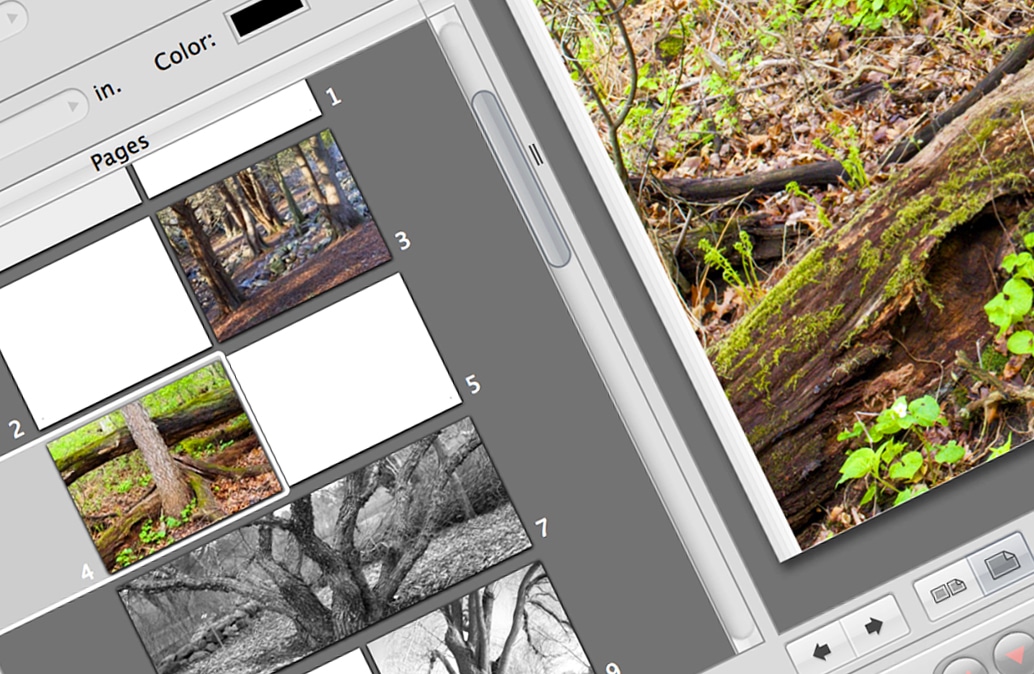
- Select a layout theme from those listed. A 20-page book is automatically created, with page thumbnails displayed on the left, single pages in a layout window, and the photos you selected displayed below. Note that the button labeled Options & Prices no longer displays the Apple printing options. Instead it goes to the upgrade page for Photos, Apple’s new, substantially dumbed-down photo application.
- Laying out the pages is as simple as dragging photos to image boxes on each page; same for paperback covers and dust jackets for hardcovers. You can have Aperture automatically place all photos in order on the pages, or place them individually for more control.
- You can change the template for each page individually. You can also choose a different theme or page size for the whole book after you’ve started, although you will have to start over with putting text on pages if you do so.
The whole process is fast and intuitive. Changing the typography is easy at the individual text block level. You can also edit existing styles and create new ones. From a professional page-layout point of view, what’s missing is layout guidelines across all pages enabling precise alignment throughout the book: you have to eyeball the alignment of page elements.
CMYK Soft Proofing Capabilities
Soft proofing is important when sending a book to be printed at a POD service, an SRDP printer, or an offset printer, because it gives you an idea what is going to happen when the RGB colors in your images are converted to the smaller range of colors in the CMYK color model used by all commercial presses.
The process is pretty simple:
- Calibrate your monitor using a gadget like Datacolor Spyder4PRO or X-Rite ColorMunki Display. Monitors—even the same make and model—vary drastically in how they display colors; calibrating helps by setting up the color rendition to a standard so soft proofing is more accurate.
- Load the ICC CMYK color profile for the destination press. You can use an industry-standard profile like GraCol, or use one provided by your printer.
- Select the soft proof view in your image editing software to get a pretty good idea of how each photo will look when printed CMYK. It will not look exactly as it will when printed, but at least you’ll see the major color shifts and be able to adjust your photo to optimize it for CMYK printing.
Unlike Lightroom—which forces you to use Photoshop to do soft proofing—Aperture makes it easy to soft proof in the process of making a photo book:
- First, load a profile you’ve downloaded or provided by your printer by putting it in this folder: /Library/Colorsync/Profiles. You can skip this step if you want to use the default generic CMYK profile, which will be less precise than using one for the press your book will be printed on, but will still be better than viewing just in RGB mode.
- With your photo book open in Aperture, select View/Proofing Profile to select the CMYK profile to use for viewing.
- Select View/Onscreen Proofing. That’s it!
If you see unpleasant color shifts in your image when onscreen proofing with a CMYK profile, that means you’re going to have to tweak your image to optimize it for CMYK printing. That’s a topic for another post.
Exporting a Photo Book PDF From Apple Aperture
Exporting a photo book PDF from Aperture is easy if you set a custom page size when you print to PDF. With the book open in Aperture, here’s how to do it:
- With the photo book open in Aperture, select File/Print Book.
- Under Paper Size, select Manage Custom Sizes.
- In Manage Custom Sizes, create a custom size and give it a name.
- Set the page size to 1/4″ larger than the page size of your photo book. For example, for an 11″ x 8-1/2″ book, set the page size to 9″ x 12″. You will notice a discrepancy here: according to standard printing nomenclature, you should set the page dimensions at 12″ x 9″ to get a landscape format. However, when you do that, it results in portrait format when previewed, so I go with the nonstandard 9″ x 12″.
- Set all four Non-Printable Area margins to zero. This prevents Aperture from creating a white border around the page.
- Back at the main print menu, select Adobe RGB (1998) as your color profile. (We will do the RGB to CMYK conversion ourselves because our equipment can provide a larger printed color gamut that way, as described here.)
- Select PDF/Save As PDF, gave the new PDF file a name, and click Save.
All pretty straightforward, except for the portrait/landscape discrepancy.
Getting Your Photo Book Printed at Bookmobile
Here are the steps for getting your photo book printed at Bookmobile:
- You’ll want to know how much it’s going to cost, so get a printing quote here.
- Send us your files. (When our customer service person provides the price quote, they’ll also provide instructions.) We’ll send you printed proofs.
- Review and approve your printed proofs.
- We ship you your books!
For much more detail on printing photo books—probably more than you need!—I’ve written a whole series of posts:
Creating a Fine Art or Professional Photo Book: Design Options Overview
Creating a Fine Art or Professional Photo Book: Design Options Part 1, Page Layout Programs
Creating a Fine Art or Professional Photo Book: Design Options Part 2, Hiring a Book Designer
Creating a Fine Art or Professional Photo Book: Design Options Part 3, Using Adobe Lightroom
Creating a Fine Art or Professional Photo Book: Design Options Part 4, Using Apple Aperture
(Note: this post still includes information about ordering books through Apple, which is no longer available.)
Maximizing Print Quality in Your Fine Art or Professional Photo Book: Part 2, Making a Print PDF
The Best Way to Print Black and White Photo Book on a Digital Press
Preparing Black and White Photographs for Printing
Printing a Fine Art Photo Book? Look At All Your Options, Not Just POD
Turning Your Art or Photo Book into an eBook
Bookmobile Adds PUR Binding for Art Books and Fine Art Photo Books
Need a printing quote, eBook conversion quote, or more information?
You can request a printing quote here, or request an eBook conversion quote here.
I’d be happy to answer questions—you can contact me via email. I welcome any feedback, especially that pointing out my errors!
Don Leeper is founder and CEO of Bookmobile, which has provided design, printing, eBook, and distribution services for book publishers since 1982.