Adobe Lightroom and Apple Aperture both serve the same function: organizing and editing digital photographs. They both have robust tool sets for converting from RAW camera files, tagging and organizing photos, performing most image editing tasks, and printing single images. They also both have features enabling the creation of photo books, which I have tested for this series of posts on creating photo books. I reviewed Lightroom in last week’s post; this week, it’s Aperture’s turn.
I am reviewing Aperture—or at least its photo book capabilities—despite the fact that Apple has recently announced its end of life. Aperture and the amateur-oriented iPhoto are being merged into a single application, Apple Photos, which is now in Beta testing. Despite this, and the fact that Aperture was only available on the Mac platform, plenty of photographers still use Aperture and may be curious about using it to make professional-quality photo books.
My intent here was not to provide a detailed how-to-create-a-photo-book guide for Aperture, but to evaluate its photo book features for the purposes of creating a professional-quality printed book. All the testing was done with Aperture 3.5.1.
Two Ways to Use Aperture’s Photo Book Tools
You can order printed copies of your photo book directly from the Aperture application. Apple contracts with third-party Print-on-Demand (POD) printers to print and fulfill those orders. But like all POD services, these services have limitations. So I tested two ways of using Aperture’s photo book layout tools: 1) laying out the book and ordering the printed books directly through Aperture, and 2) laying out the book and exporting a file for printing at a short-run digital printer (SRDP) or offset printing company. The second option is worth considering if you want more than a couple of dozen books: compared to POD services, printing at an SRDP or offset printer can definitely be a better choice in terms of cost, printing options, and quality. For the latter experiment, I went as far as printing the cover and interior files exported from Aperture on our own digital presses, so I could test the book files exported by Aperture.
I have been an Aperture user for several years, so I had plenty of photos to use for the test. Because I don’t have a book’s worth of images on a single theme, I put together a collection of non-related images for testing purposes: landscapes, mostly, but also a couple of portrait collages. I used both color and monochrome images. (If you’re interested, the images were created on a Canon 60d, a Fuji X-E1, and a Sony A7r.)
Making a Photo Book in Aperture
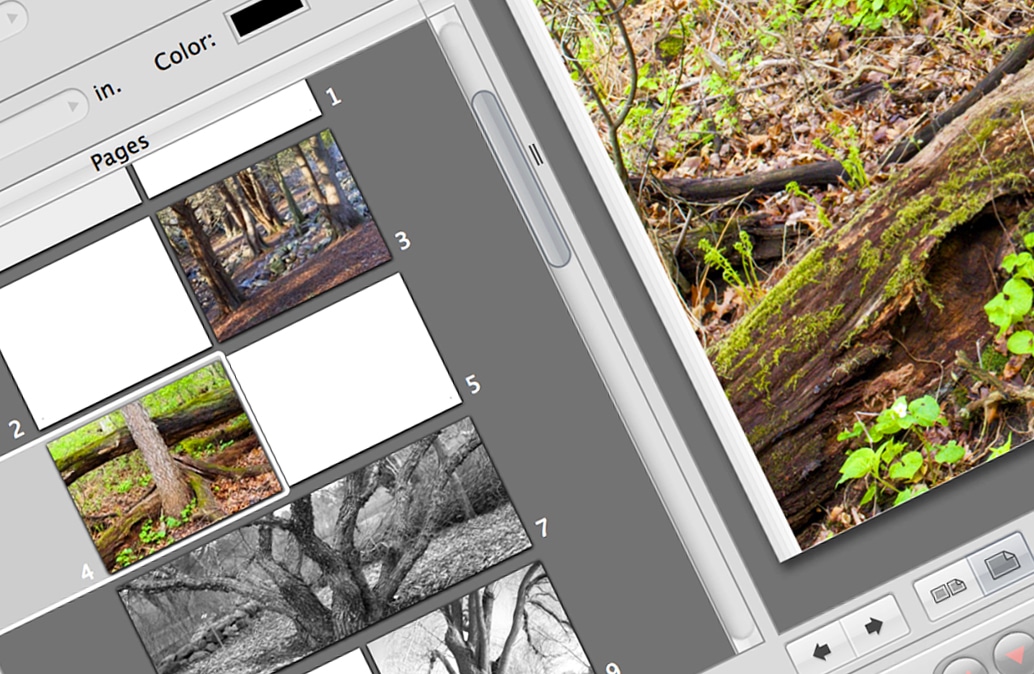
Like the workflow-organized tab layout in Lightroom, the initial creation of a photo book in Aperture is quite straightforward. Here’s a somewhat simplified explanation:
- Gather the photos you want to use in the book in an Album. (In Aperture, Albums are ways to collect photos together for editing or other purposes. They are similar to Lightroom’s Collections.)
- Select the new Album, and click the browser view icon, which displays all the photos in the album in a matrix.
- Select all the photos. The keyboard short cut is the usual Mac one: Command-A.
- On the menu bar, select File / New / Book. A popup menu appears.
- In the popup menu, select one of four standard sizes, create a custom size, or investigate custom options through the four Apple print partners who serve photographers.
- Select a layout theme from those listed. A 20-page book is automatically created, with page thumbnails displayed on the left, single pages in a layout window, and the photos you selected displayed below.
- Laying out the pages is as simple as dragging photos to image boxes on each page. Same for paperback covers and dustjackets for hardcovers. You can have Aperture automatically place all photos in order on pages, but I preferred to place them individually for more control.
- You can change the template for each page individually. You can also choose a different theme or page size for the whole book, although you will have to start over with putting text on pages if you do so.
The whole process is fast and intuitive. Changing the typography was easy at the individual text block level. But where you really want to be managing type specs in a book is at the document styles level, so you can get consistently styled captions, headings, etc. throughout the book. After about fifteen minutes of exploration, I figured out where to edit existing styles and create new ones. Nice!
On the other hand, search as I might—both with Google and within the Aperture application—I could not find layout guidelines. Because variations in page placement stick out when you are flipping through a book, you want to have precise and consistent control over the positioning of both type and image elements when making one. In Aperture, while you can do this indirectly through managing master pages and keeping track of XY positioning of elements on each page, the more efficient way is to be able to work with guidelines displayed on every page the book. Unless you bleed every photo off the edge of the page, never crop your photos, and never need to do micro adjustments of scaling, you will always need to fine tune positioning on individual pages: without guidelines this is much tougher.
CMYK Soft Proofing Capabilities
Soft proofing is important when sending a book to be printed at a POD service, an SRDP printer, or an offset printer, because it gives you an idea what is going to happen when the RGB colors in your images are converted to the smaller range of colors in the CMYK color model used by all commercial presses.
The process is pretty simple:
- Calibrate your monitor using a gadget like Datacolor Spyder4PRO or X-Rite ColorMunki Display. Monitors—even the same make and model—vary drastically in how they display colors; calibrating helps by setting up the color rendition to a standard so soft proofing is more accurate.
- Load the ICC CMYK color profile for the destination press. You can use an industry-standard profile like GraCol, or use one provided by your printer.
- Select the soft proof view in your image editing software to get a pretty good idea of how each photo will look when printed CMYK. It will not look exactly as it will when printed, but at least you’ll see the major color shifts and be able to adjust your photo to optimize it for CMYK printing.
Unlike Lightroom—which forces you to use Photoshop to do soft proofing—Aperture makes it easy to soft proof in the process of making a photo book:
- First, load a profile you’ve downloaded or provided by your printer by putting it in this folder: /Library/Colorsync/Profiles. You can skip this step if you want to use the default generic CMYK profile, which will be less precise than using one for the press your book will be printed on, but will still be better than viewing just in RGB mode.
- With your photo book open in Aperture, select View / Proofing Profile to select the CMYK profile to use for viewing.
- Select View / Onscreen Proofing. That’s it!
If you see unpleasant color shifts in your image when onscreen proofing with a CMYK profile, that means you’re going to have to tweak your image to optimize it for CMYK printing. A topic for another post.
Printing Through Apple
Once I finished laying out my test photo book, which wound up being 22 pages, I ordered printed paperback copies right through the Aperture interface by clicking a Buy Book button on the layout screen. Easy.
The Result: Printed Books
I received the two copies of the photo book I had ordered through Aperture seven days after I ordered them. They were well packaged and in perfect condition. The cover and interior printing were excellent. However, the binding was deficient in two respects: 1) The cover was not laminated, and 2) The cover was bound cross-grain.
Binding and Paper Grain Direction
All machine-made paper has a grain direction resulting from the way the paper fibers orient themselves as the slurry of wet wood pulp is transported through the papermaking machine. Although this grain is not visible in the finished paper, it makes a big difference in which way the paper wants to curl. A book page turns easily if the grain is parallel to the spine of the book; it fights against being turned if the grain is perpendicular to the spine.
I tested the cover of the Aperture photo book by creasing the back cover parallel to the spine. If the grain is parallel to the spine, the crease will be smooth; if it is perpendicular to the spine, the crease will be lumpy and irregular. The result was clear: the Apple photo book cover was printed and bound with the grain perpendicular to the spine, a distinct quality demerit. (Book publishers have had printers reprint orders of thousands of books for violating this rule!)
Worse still, because the cover was not laminated, it showed cracking and rub marks with a very small amount of handling. A disappointment, because the printing itself was good quality.
Workflow: A Quandary
The normal process for high-quality book printing is that the printer shows the customer color proofs showing how the cover and pages are to print, before the book is actually put on press. At an SRDP printer—at least here at Bookmobile—these proofs are printed on the actual press that will print the book, so they are an excellent representation of how the book will print. We even laminate cover proofs so that they will show the slight color shifts that happen when a cover is laminated. Offset printers provide proofs printed on high-quality inkjet printers that are precisely calibrated to emulate the color gamut of the offset press that the book will print on. With these proofs in hand, the customer can make changes to the color or have the printer make changes. The printer will then make another set of proofs. Only when the customer approves the proofs will the book be printed. The press operator then uses the approved proofs as a reference when setting up the press to ensure that the actual book resembles as closely as possible the proofs the customer has seen and approved.
With a POD printer like those that produce the books you can order directly through Aperture, it is not possible to emulate the workflow used for SRDP and offset, because ordering, printing, and binding are all automated. Although the digital presses are no doubt frequently calibrated, even the best-calibrated digital press varies subtly from day to day. Besides that, it is probably highly likely that if you order a copy of a book and then later order more copies, the new copies will not be run on the same press. Because Apple uses multiple POD printers, it might not even be printed at the same company! Finally, POD operators are certainly not comparing what’s coming off the press to an approved proof and adjusting the press accordingly. What I saw in my test with Aperture was pretty good, but if I’m going to invest in an edition of photo books that is more than a handful of copies, I’m going to want to optimize image quality via the proof review process to match my vision of how the photos should print. The POD workflow does not allow this.
The other issue with POD for longer runs is cost: for run lengths between 50 and roughly 1,000, POD is going to be much more expensive than SRDP; and for more than 1,000 copies (roughly), offset will beat them both. (I discussed choosing printing method based on the number of copies in this post.)
If you like the Aperture photo book tool, it may be worth investigating the four custom photo book providers listed in the Aperture interface. Based on the information on their websites, these printers offer more options, and possibly more control, than what is available with the default POD options.
Using the Aperture Photo Book Feature to Print
at an SRDP or Offset Printer
My other thought was that if you could get a printable photo book file out of Aperture, you could print it at a SRDP or offset printer of your choice and not be limited to Apple’s printer partners. So I gave it a try.
Exporting a photo book PDF from Aperture was easy after I figured out you have to set a custom page size when you print to PDF. With the book open in Aperture, here’s how to do it:
- With the photo book open in Aperture, I selected File / Print Book.
- Under Paper Size, I selected Manage Custom Sizes.
- In Manage Custom Sizes I created a custom size I called Aperture Photobook.
- I set the page size to 9 x 12 inches, which allows an extra quarter of an inch around every edge to allow for bleed for this 11 x 8-1/2 inch book. You may notice a discrepancy here: according to standard printing nomenclature, I should have set the page dimensions at 12 x 9 to get a landscape format. However, when I did that it resulted in portrait format when previewed, so I went with the non-standard 9 x 12.
- I set all four Non-Printable Area margins to zero. This prevents Aperture from creating a white border around the page.
- Back at the main print menu, I selected GRACol2013 as my CMYK color profile.
- I selected PDF / Save As PDF, gave the new file a name, and clicked Save.
All pretty straightforward, except for the portrait/landscape discrepancy. Unfortunately, the PDF Aperture created was missing all the page bleeds!
Bleeds and Photo Books
A “bleed,” in printer’s parlance, means that an image or area of color runs off the edge of a page. Almost all paperback covers and dustjackets bleed; many, but not all, illustrated books have interior images that bleed. In order to accomplish a bleed the printed area is extended beyond where the final book pages will be trimmed. When sending PDF print files to a printer, in order to accomodate a bleed, the extended print area must be preserved in the PDF. The Aperture photo book PDF export didn’t extend the bleeds beyond the edge of the page. Major problem.
There is a fiddly workaround: create the photo book with a page size larger than the one you want to end up with, and then fiddle with the layout so the text and image elements land where they ought to. Given the previously-mentioned lack of guidelines, this would be doable, but it would involve not only producing a sub-optimal PDF in terms of accurate page dimensions, but would also require communicating extremely clearly to the printer what was going on and how you wanted these oversized page images positioned.
Aside from the non-trivial bleed issue, the exported PDF was printable if one of our color experts tweaked the file. We successfully printed out pretty good first-pass page proofs, and could have brought them up to snuff with an investment of color correction time, were it not for the missing bleeds and cropped pages.
Apple Aperture Photo Book Creation: Pros and Cons
Pros
- Free book layout tools, if you already own Aperture.
- Nice interface and easy page layout, including two-page spreads.
- Custom page sizes available.
- Ease of ordering printed copies from Apple.
- The printing was pretty good in the photo book I ordered through the interface.
- Apple’s packaging was excellent.
- The order arrived reasonably quickly.
- Good support for soft proofing using CMYK ICC profiles.
- Support for exporting a PDF using CMYK ICC profiles.
- High-end custom photo books available through four custom print partners.
Cons
- Layout tools lack guidelines.
- On the photo book I ordered through the interface, the cover was printed cross-grain.
- The cover was not laminated.
- The Aperture workflow is unworkable for optimizing image printing quality through the standard proof approval process.
- The cost of printing through Apple is high for longer runs compared to SRDP and offset.
- Many fewer printing default options through Apple compared to SRDP and offset, though the four custom providers look like they may offer a lot more.
- The PDF export for printing anywhere other than the Apple providers is non-functional if there are any bleeds, unless you want to fudge page sizes, inviting miscommunication with your printer.
- Aperture has been discontinued. Its not really an option unless you already own it.
Conclusion
I liked laying out the photo book in Aperture. It was a much better experience than using Lightroom’s photo book tools. However, given the cover quality problems with the default print option, the no guidelines problem, the PDF export problem, the general POD workflow problem, unless I wanted to do a quick and dirty photo book I would not use Aperture. If you use Aperture now you might be considering moving to Lightroom because of its EOL status. Lightroom has some of the same photo book issues, and provides printing only through Blurb, but at least Adobe is apparently committed to it going forward. Here’s my review of using Lightroom for photo books. Otherwise, check out other options for photo book design and printing.
Need a printing quote or more information?
I’d be happy to answer questions—you can contact me via email. You can request a printing quote here.
Don Leeper is founder and CEO of Bookmobile, which has provided design, printing, eBook and distribution services for book publishers since 1982. He set up his first darkroom in a basement bathroom in fifth grade and has worked as a professional photographer. He continues to satisfy his love of photography through appreciation of great images, an interest in photographic technology, and trying to improve his own photography.