
Regardless of how you print your photo book—through a Print-on-Demand (POD) service, short-run digital printing (SRDP), or an offset printing service— it can be a challenge to ensure that the images on the printed pages of your books are true to your photographic vision. When print quality is a priority, the choice of color workflow becomes critical. This post is the second in a series of three on managing color from computer to finished photo book. The first in the series, about using color profiles to soft proof on your monitor, is here. This series follows up on posts on options for creating your photo book and printing your photo book.
When you are printing photographs in a darkroom or on an inkjet printer, you have the luxury of simply making test prints and tweaking the exposure, contrast, etc. through succeeding tests until you arrive at a print with the qualities you want. True, adopting color management practices like monitor calibration and using color profiles can streamline this process, but they are not strictly necessary. When you go to a photo book printing service, however, unless you have unlimited patience and an unlimited budget, it is not really practical to rely on repeated test prints to maximize the final print quality. Because of this, adopting good color management techniques is your best option for reducing frustration, saving you money, and improving your finished books. And it is not that hard!
Here are the main steps:
- Calibrate your monitor and use a color profile to previsualize—”soft proof”—how your images will print. This is covered here.
- Make sure that all PDF settings are correct when preparing the cover and interior PDFs to send to the printer.
- If you use an SRDP or offset printer, review printed proofs and make changes intelligently.
I’m going to cover step 2 in this post, using Adobe InDesign as an example, because it’s the most common professional page layout package, and the best. (I’m using the Mac version, but the Windows version is very similar.) I’ll cover step 3 next week. Also, just to be clear, this series covers color image printing: printing black and white photos requires a slightly different treatment—perhaps a topic for a future post.
Why Supply PDFs to the Printer for a Photo Book?
PDFs provide a standardized file for printers to work with regardless of the particular kind of computers, raster image processors, and presses they use, and can help avoid the issue of missing images and fonts that occurs all to frequently when you send InDesign or Quark Xpress application files to the printer. Weird things can also happen when your files are opened in somebody else’s copy of InDesign with their fonts: supplying a PDF instead of InDesign files avoids these types of issues because the PDF freezes the layout of the pages in its final form. In addition, if done properly the process of creating the PDF can be a key part of your color management process. If done incorrectly, it can undo all the work you’ve put into your book so far.
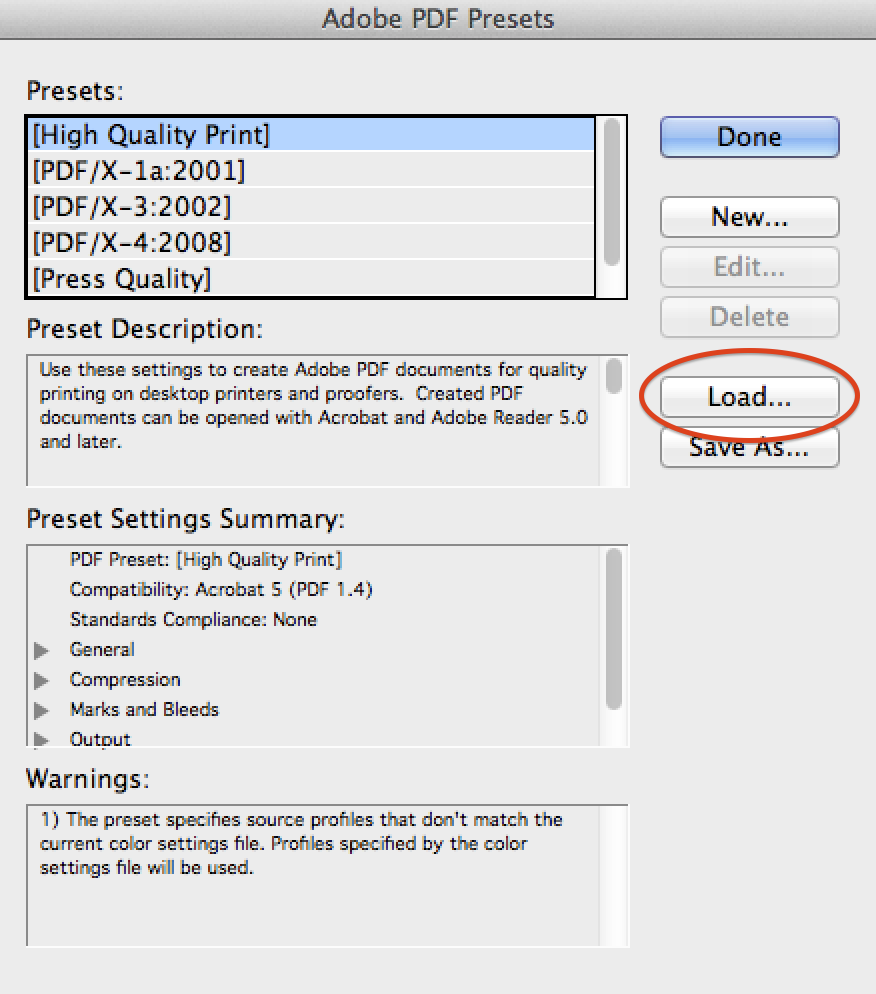
To make a PDF for your photo book printer, you need to do three things: 1) load the appropriate color settings in InDesign, 2) load the PDF presets supplied by the printer, and finally 3) output the PDF file.
Loading the Color Settings
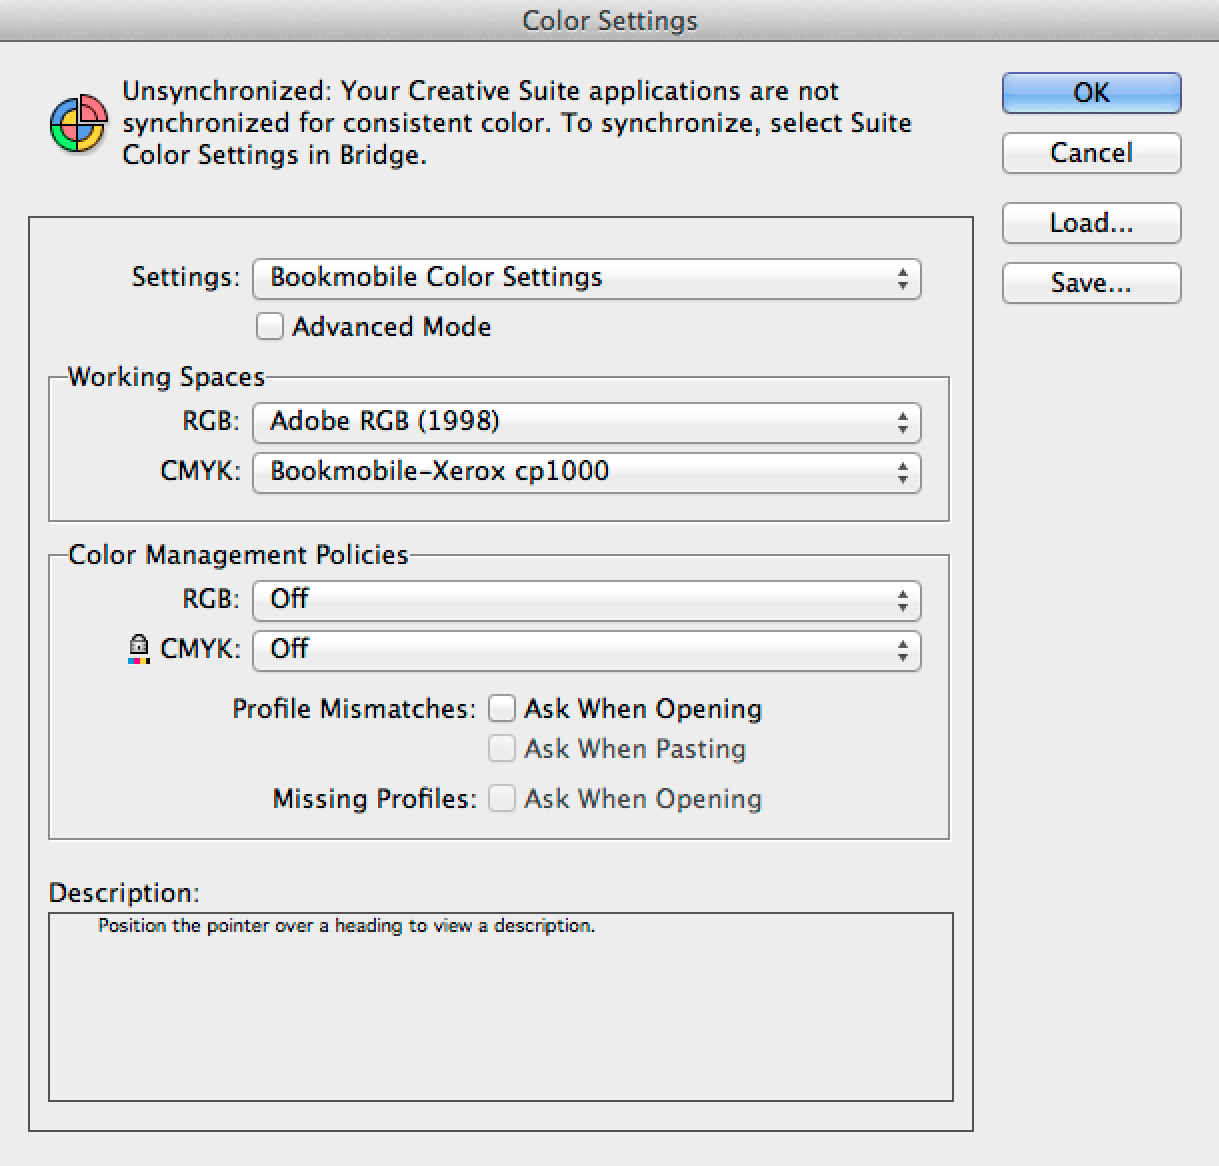
It is important that the correct color profile and other settings be set up in InDesign before creating PDFs for a photo book. The printer you are using should furnish an Adobe color settings file (.csf file), which will specify the correct color profile, either a standard profile like GRACoL or a custom profile for their particular press setup. It should be exactly the same profile you used for any soft proofing in Photoshop or InDesign. I’m going to use a .csf file referencing the Bookmobile custom ICC profile in my examples. Here’s how to load the color settings in InDesign:
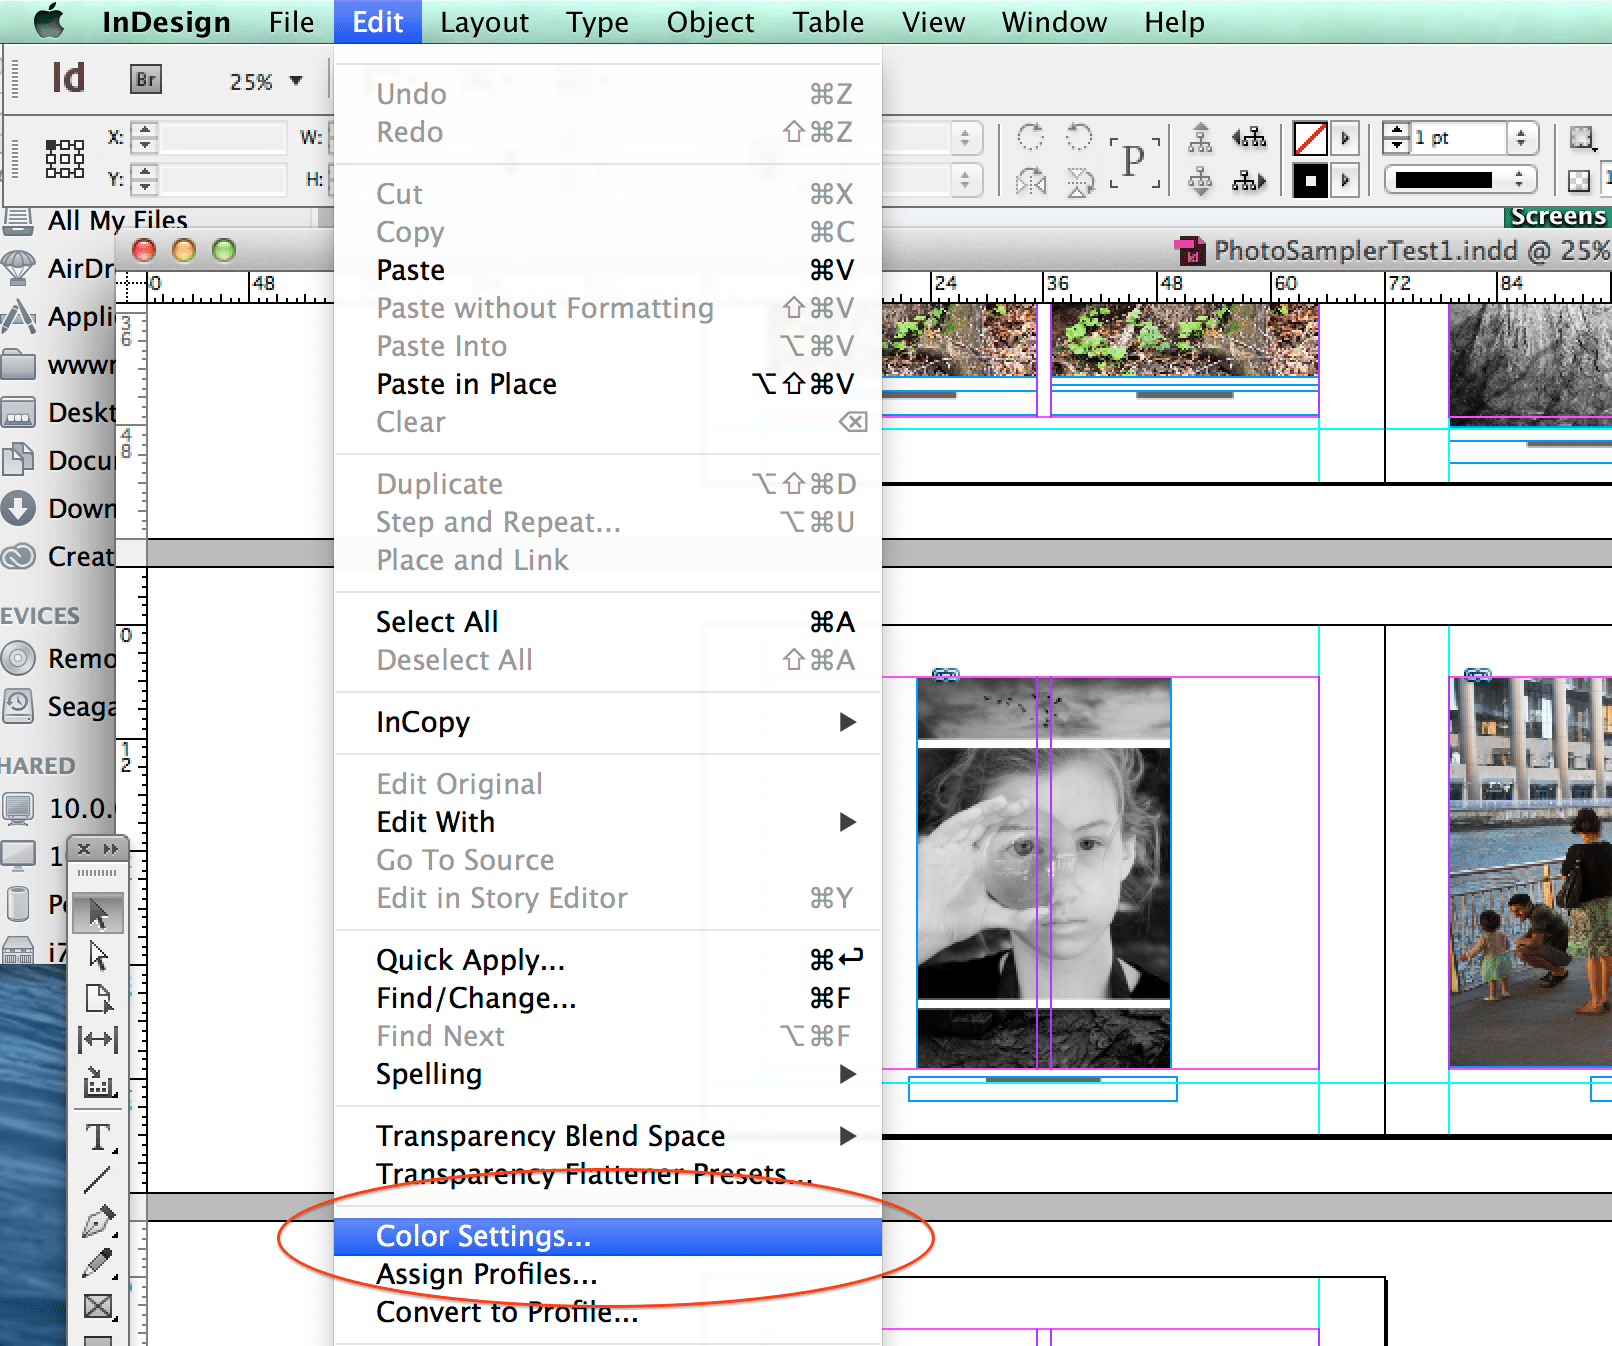
1. Go to Edit / Color Settings.
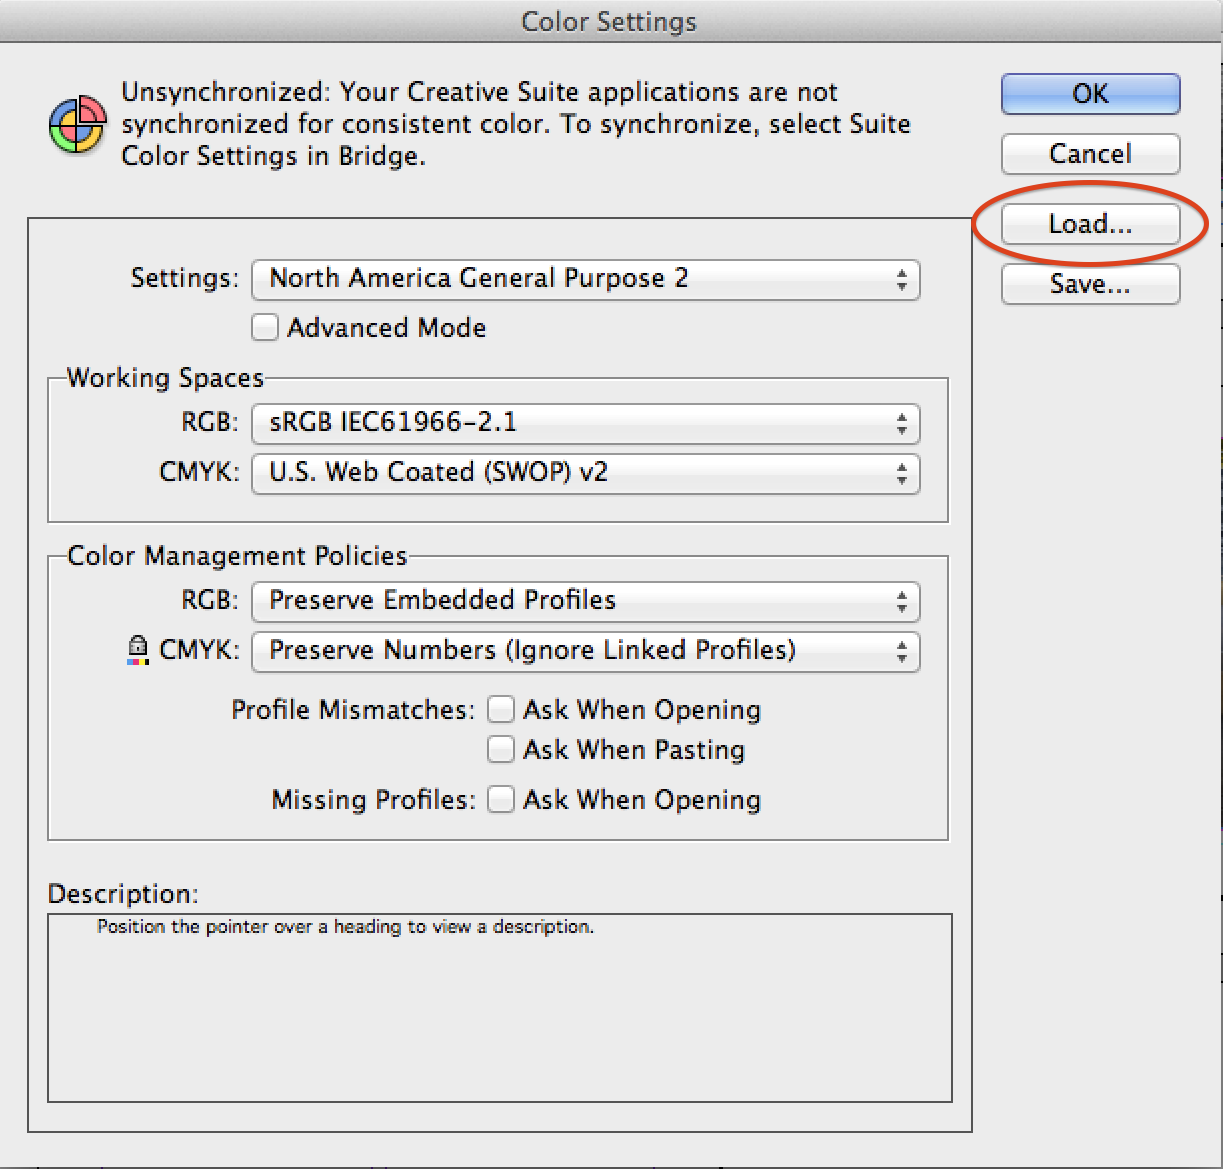
2. Click the Load button.
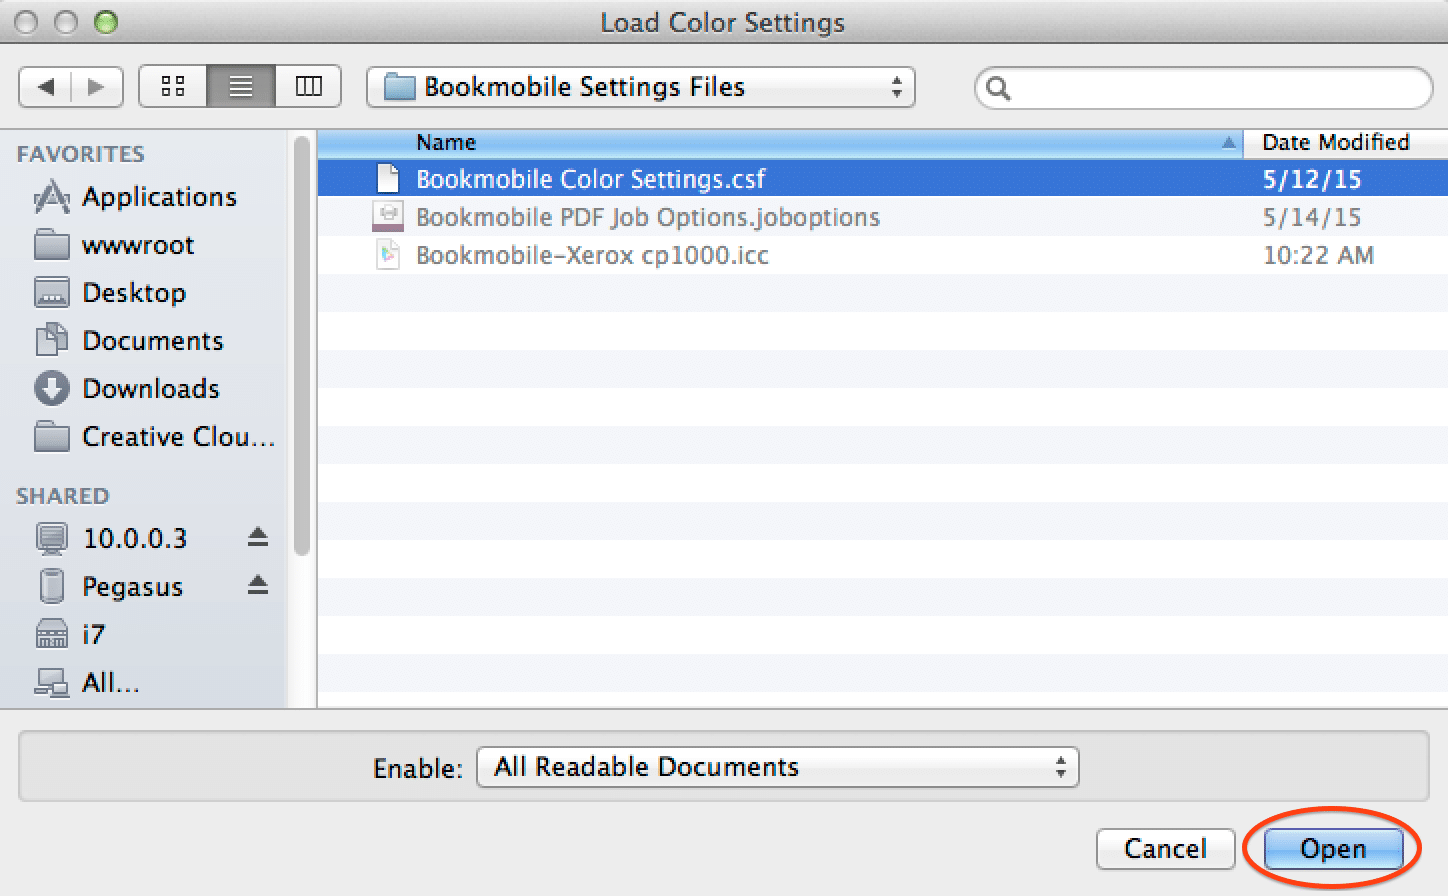
3. Find the color profile file, select it, and click Open.
That’s it for Color Settings! When you’re done the Color Settings should look like this:
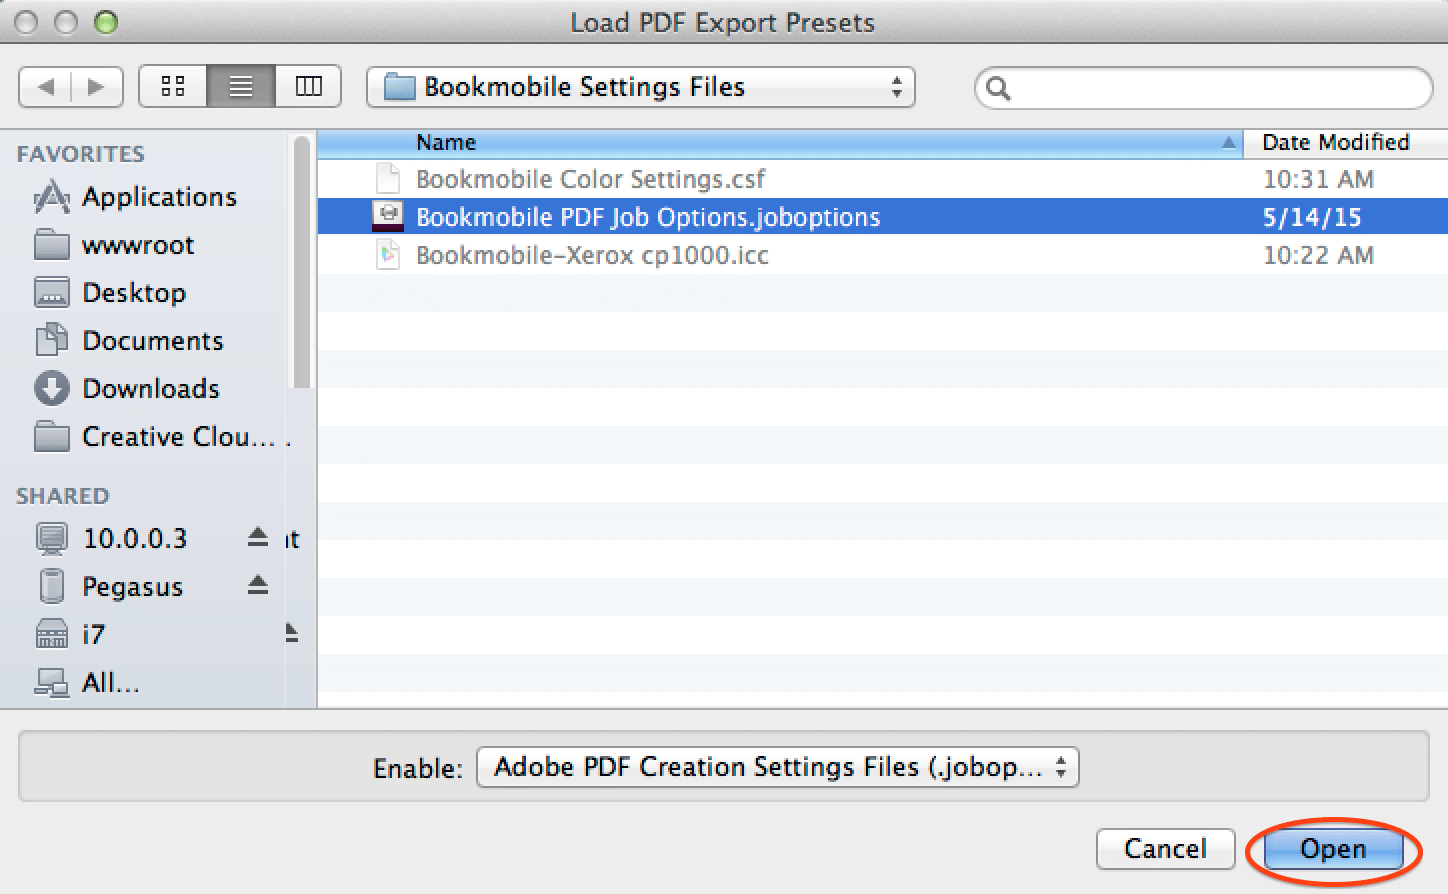
Set up the PDF Presets for Your Photo Book
Creating a PDF for high quality printing requires paying attention to all the output settings—and there are a lot of them! Fortunately, most printers can provide a PDF presets file that will automatically set up InDesign to produce PDF files tuned for their production process. (If they don’t provide a presets file, they should provide screen shots of all the appropriate settings so you can create a preset yourself.) Here’s how to load a printer’s PDF settings in Indesign:
1. Go to File / Adobe PDF Presets, and select Define.

2. When the Adobe PDF Presets box comes up, click the Load button.
3. Locate the presets file supplied by the printer, select it, and click Open. That’s it!
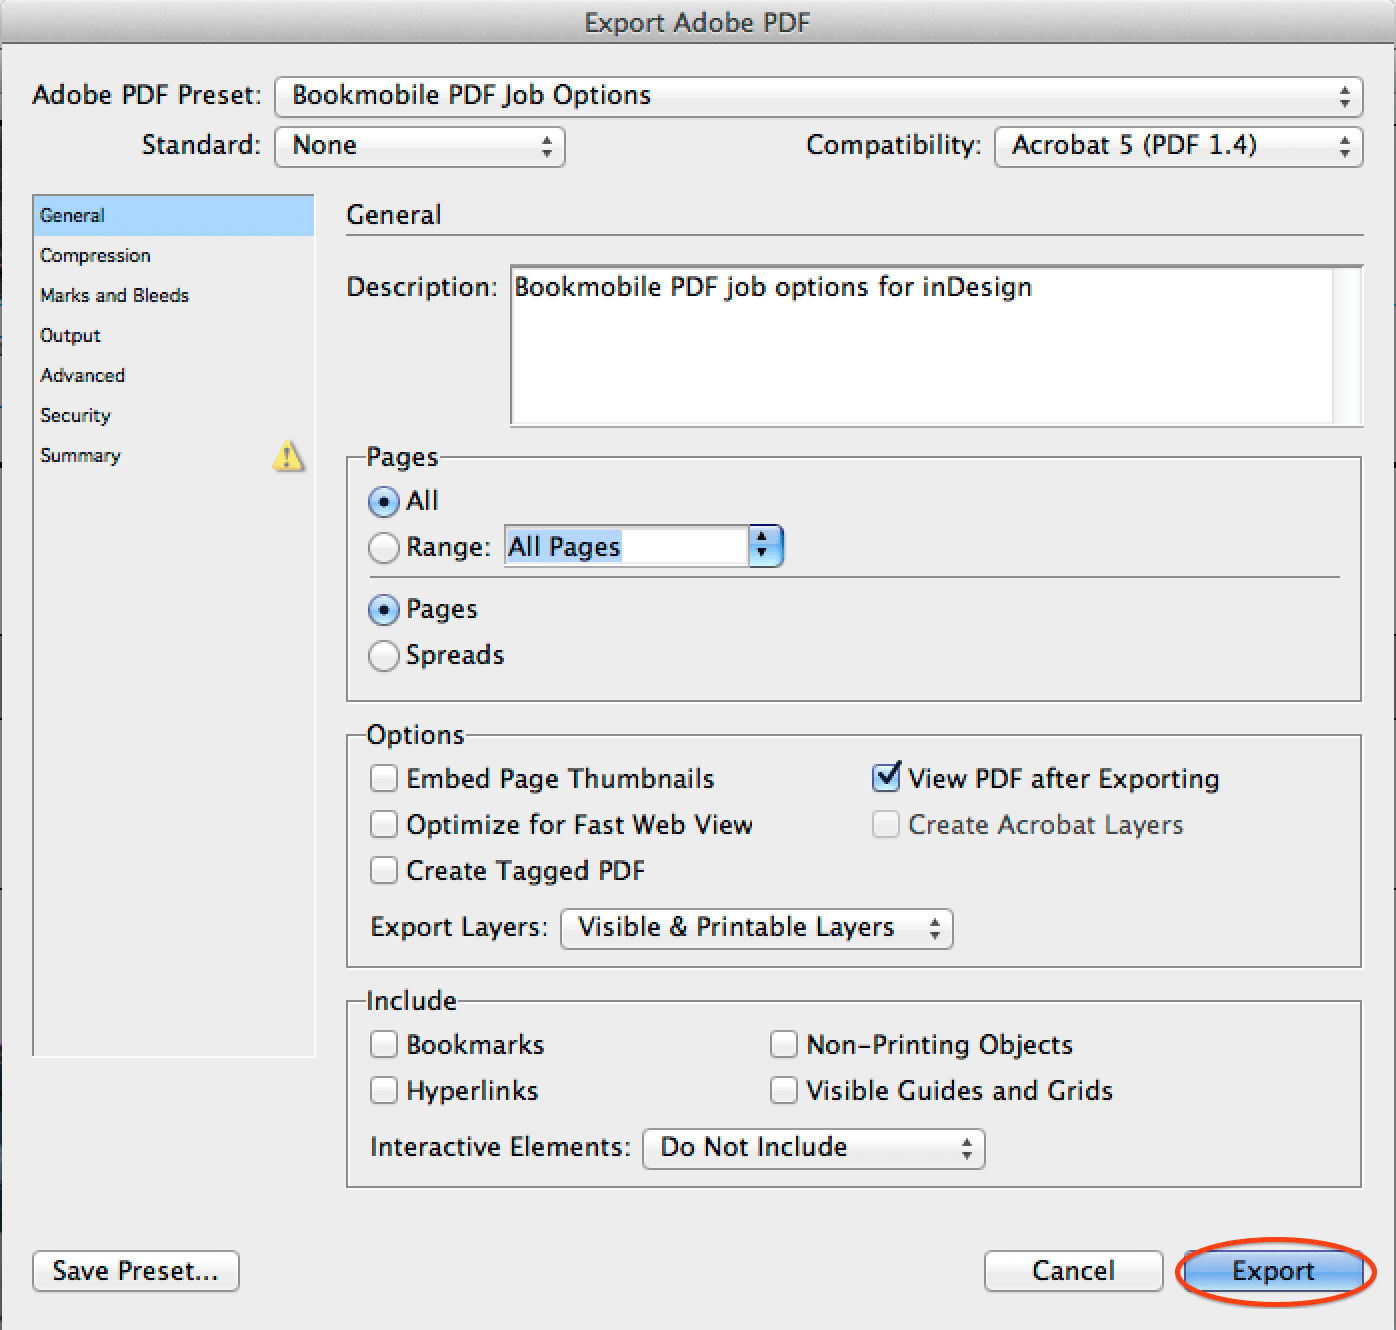
Creating the PDF
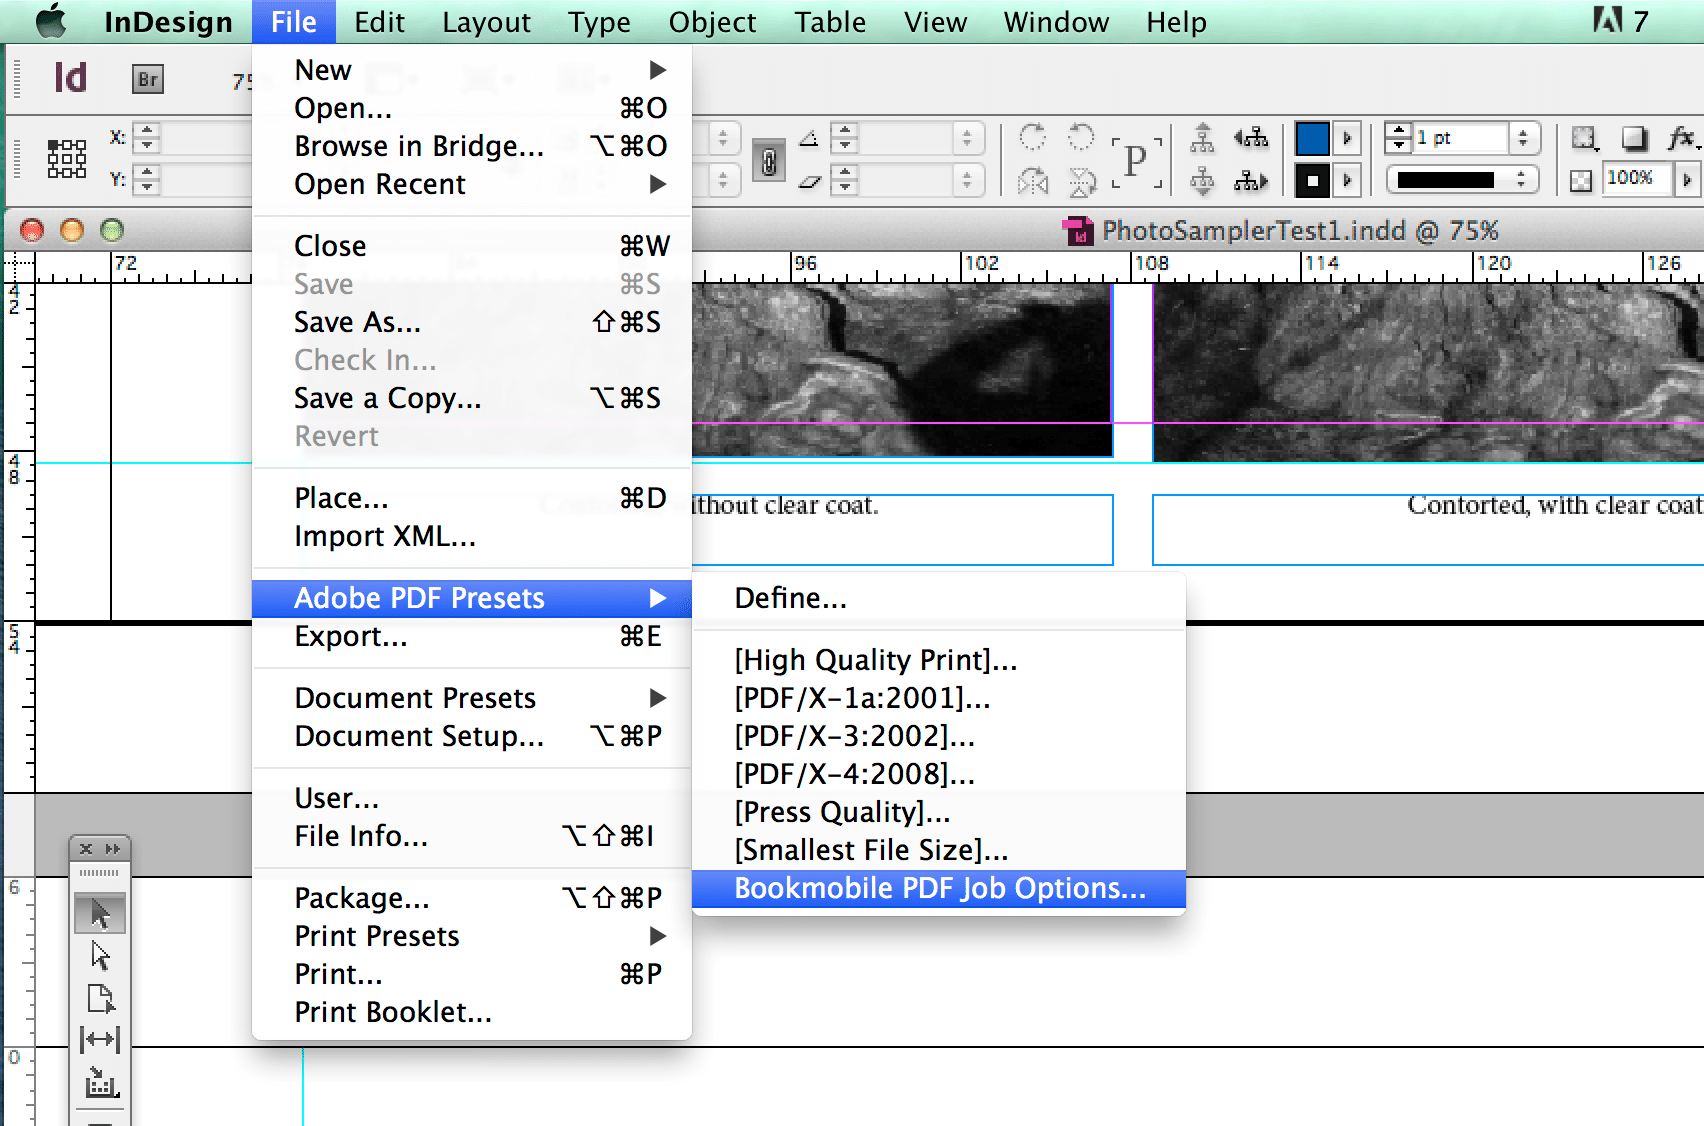
1. With your InDesign photo book file open, select the PDF preset you just loaded to use for output by going to File / Adobe PDF Presets. The preset you just loaded appears in the menu: select it.
2. Name your output file and indicate where you want it to be saved. Then press Save.
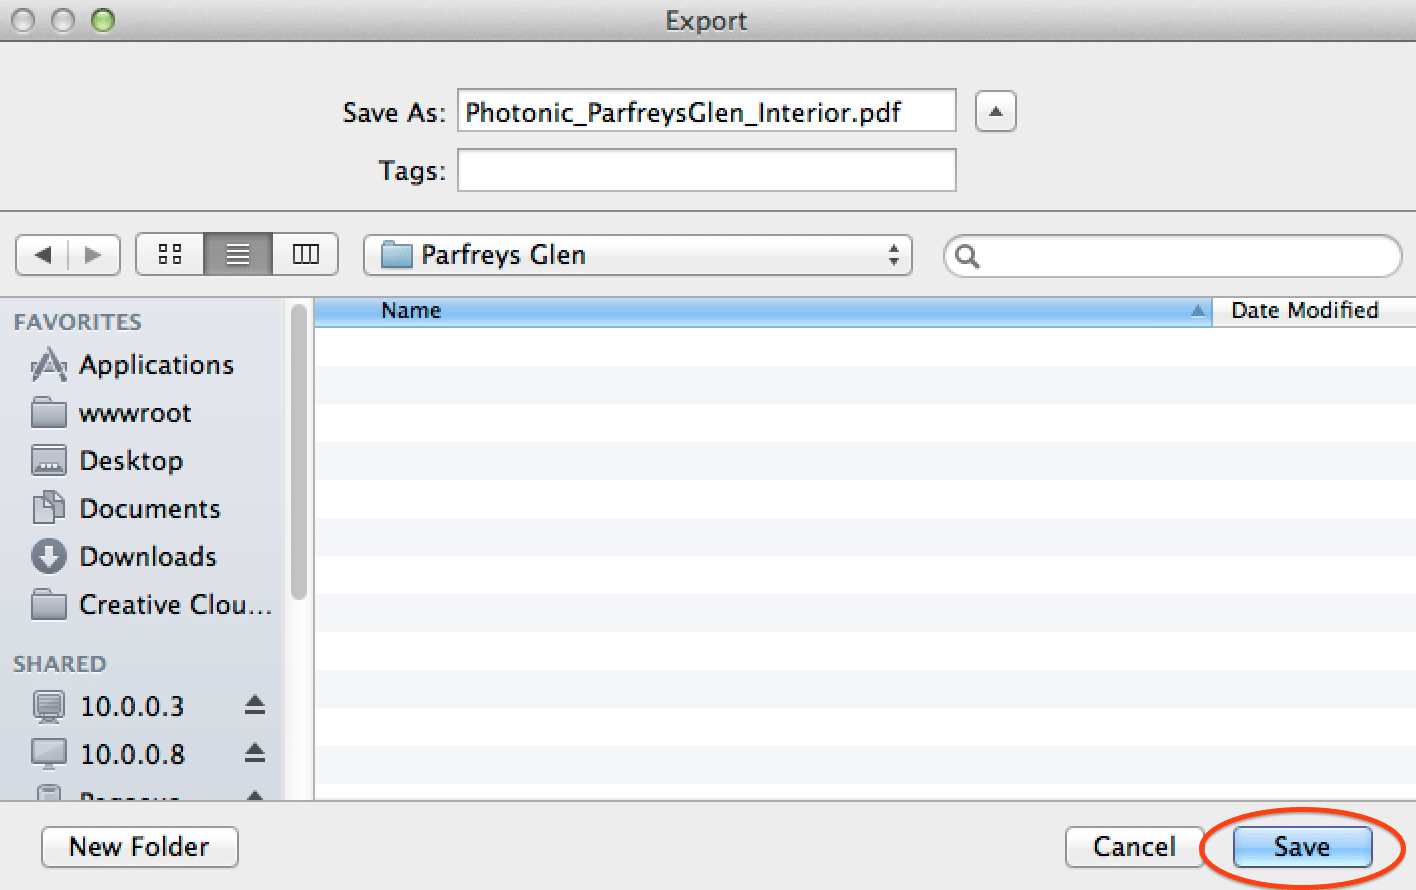
Note: it is a really good idea to name the file with the title of your book and description of the file, something like: MeanStreets_Interior.pdf, or MeanStreets_Cover.pdf. Adding the company name makes it bulletproof: Streetphoto_MeanStreetsInterior.pdf. Don’t just use something like “book.pdf” or even “bookinterior.pdf”: your printer is likely dealing with hundreds of book projects at a time: anything you can do to help keep things straight will be to your benefit.
3. Finally, click the Export button on the Export Adobe PDF screen.
Sending the Photo Book File to the Printer
Big hi-res PDF files cannot usually be sent by email. The printer will provide instructions on how to upload your file via FTP, Hightail, or other file transport method.
Next Week, The Final Step
Next week I’ll post Part 3 in this series: Proofs and the Proof Review Process.
Need a printing quote or more information?
I’d be happy to answer questions—you can contact me via email. You can request a printing quote here.
Don Leeper is founder and CEO of Bookmobile, which has provided design, printing, eBook and distribution services for book publishers since 1982. He set up his first darkroom in a basement bathroom in fifth grade and has worked as a professional photographer. He continues to satisfy his love of photography through appreciation of great images, an interest in photographic technology, and trying to improve his own photography.