There are three different categories of printable images: full color, line art black-and-white, and continuous tone black-and-white. I’ve covered full color image preparation in a series of posts starting here, and preparing continuous tone black-and-white images here. This post is about preparing black-and-white line-art images for printing on an offset or digital press.
In printing nomenclature, line art is an image in which the original consists only of solid color against a white background. Examples of line art include type, pen-and-ink drawings, and prints from wood engravings. Images with any kind of gradation of tones in color or black-and-white —watercolors, oil paintings, stone lithographs, and, of course, photographs—are not line art and must be converted to a halftone image in order to print on a press.
Line art is usually simple to prepare for printing: scan the image as “black-and-white” instead of as grayscale, sizing it to close to the final printing size as you scan. (Different scanning software uses different terminology for the line art setting: “black-and-white” and “type” are two common terms.) Scan at 600 dpi (dots per inch): 300 dpi is actually not fine enough to preserve fine line art detail.
If you are reproducing a line art image with a digital camera, you’ll have to manipulate the image in Photoshop, Pixelmator, or another image editing package to convert it to grayscale from RGB, bring the background tone down to 0%, and set the darkest tones appropriately.
If the line art image is created with type fonts, no conversions should be necessary: save the image as a PDF and place it. The same is true for images created with vector image editing software such as Adobe Illustrator.
While usually simple to do, there are a few pitfalls in handling line art images:
- Reducing the size of the image too much when it is placed in the page layout program can result in making lines too fine to print.
- Enlarging the image too much when it is placed in the page layout program can result in scan-line jaggies showing along curves. Remember that if you scale up a 600 dpi image in the page layout program to 200% of the original size, the effective resolution is 300 dpi (600 dpi / 200% = 300 dpi).
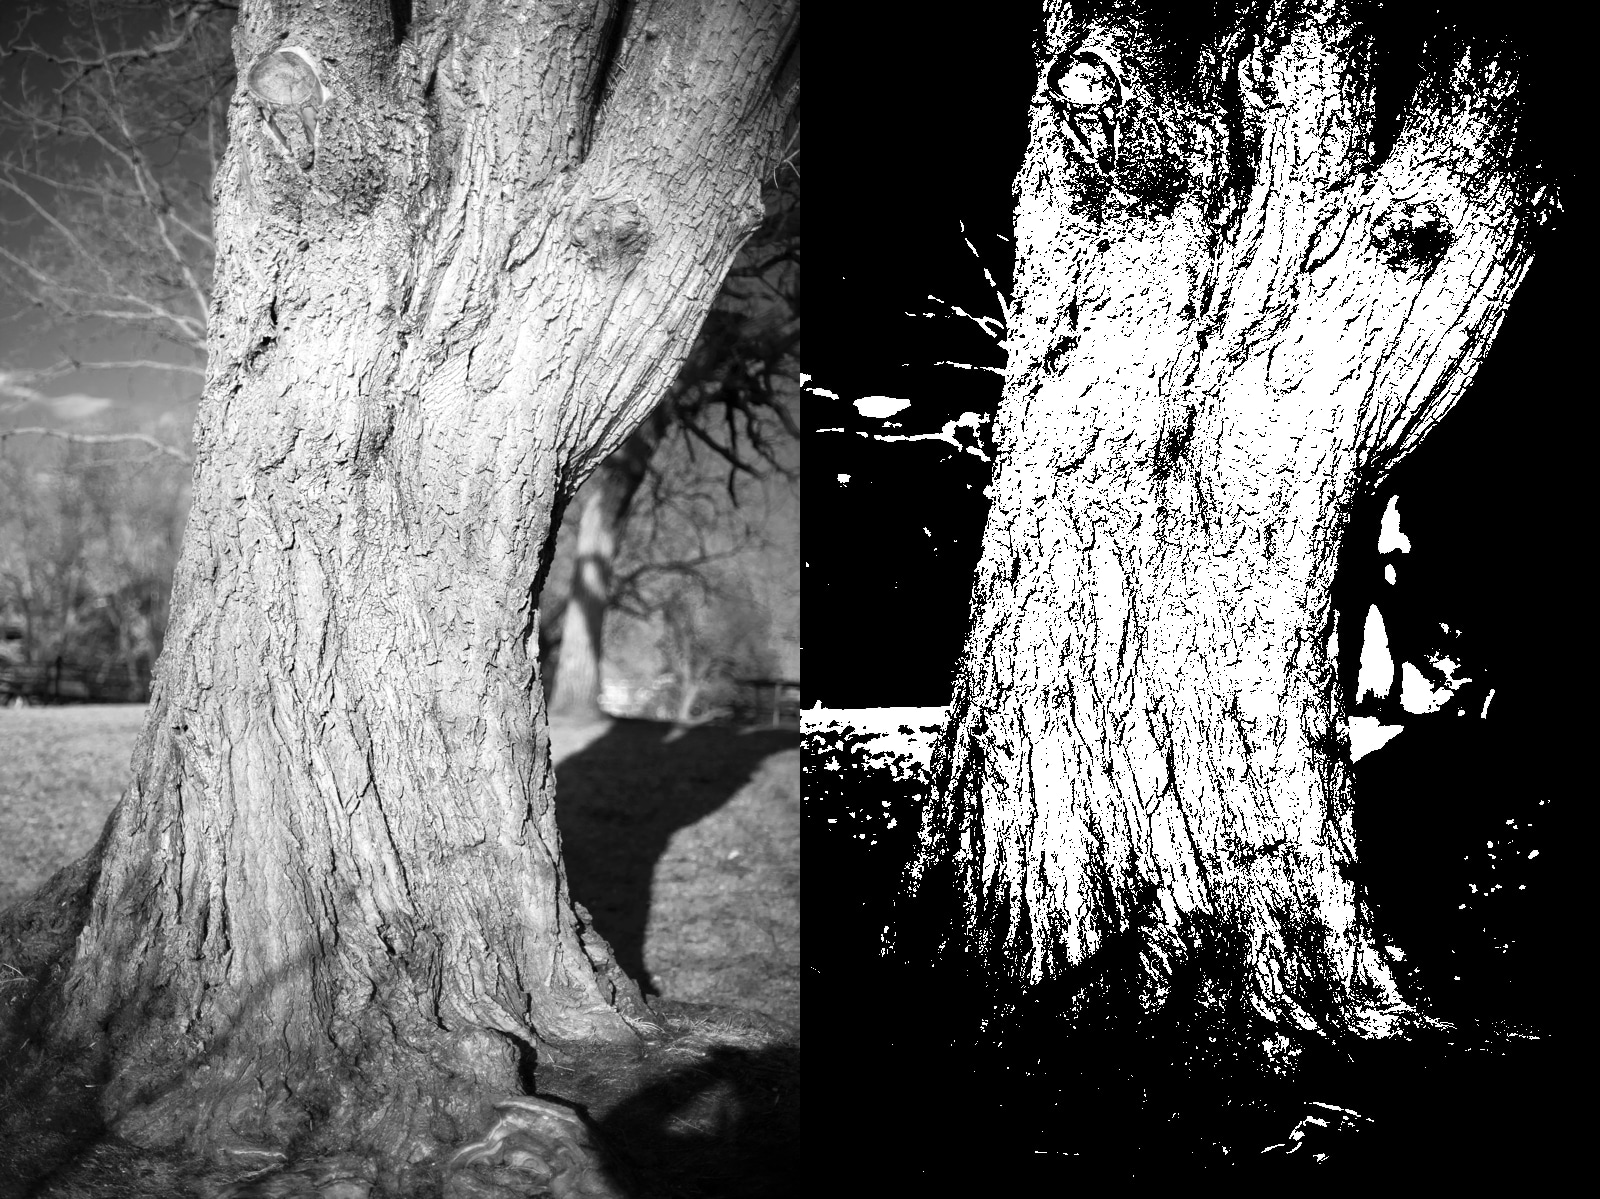
- Some artwork that is classified as line art, such as pen-and-ink drawings, can actually have subtle gradations of tone. If those gradations are eliminated by converting the image to pure black-and-white, the quality of the image may be degraded in comparison to the original. If you scan such an image and find that prints from the image look somehow lacking, the loss of subtle gradations could be the culprit. In such cases, it may pay to scan the image as a halftone, convert it to grayscale, use the Photoshop curves or levels tool to set the background grayscale value to 0% to eliminate the background tone, and set the darkest part off the image to 97%. There is a tradeoff here: because halftone screen rulings (lpi, or lines per inch) are coarser than image dots (dpi, dots per inch), the resulting jaggies in curves of the halftoned image may be more objectionable than the loss of subtle gradations from just scanning the image as line art. Test prints are definitely in order here if optimum quality is desired.
Speaking of test prints: use an office laser to get an initial idea of how a line art will print. You’ll see any gross quality problems. However, such a test print will not print exactly as an offset or digital press does. The proofs an offset printer provides will give a better idea of the ultimate printing quality, though usually still not exact. If you use a digital book printer like Bookmobile, you should get proofs printed on the actual press the book will print on, which is the most accurate kind of proof.
Printing Line Art In Black
When you place a line art image in a page layout program such as InDesign, that image will print black unless you specify otherwise.
Printing Line Art In Color on Offset Presses
If cost is no object, you can print line art in any Pantone color on an offset press by setting the color of the image in your page layout file and telling the printer that you want to print the book in black plus a second color. It costs more, because the printer has to make separate plates and run the second color as either an additional pass on a one-color press or as a custom color on a multicolor press. If the book is printing on a CMYK (Cyan Magenta Yellow Black) press, the Pantone color will be converted to the closest possible CMYK match, which may or may not be close: there are some Pantone colors that are not reproducible using CMYK. Of course, if the book is printing on a CMYK press you can also set the color of line art using the CMYK system, which will have more predictable results.
Printing Line Art In Color on Digital Presses
You can also print line art in color on a 4-color digital press. Again, set the color of the image in your page layout program, using either CMYK colors or Pantone colors. Because of the fact that all commercial digital presses that print in color use the CMYK color system and do not print Pantone colors, the line art will not print in a solid color but will be made into a 4-color halftone via the normal CMYK process, with resultant loss of crispness and potential jaggies along curves. If you set the color of the image using the Pantone system, it will be converted to the closest possible CMYK match for that color.
Need a printing quote, eBook conversion quote, or more information?
You can request a printing quote here, or request an eBook conversion quote here.
I’d be happy to answer questions—you can contact me via email. I welcome any feedback, including that pointing out my errors!
Don Leeper is founder and CEO of Bookmobile, which has provided design, printing, eBook and distribution services for book publishers since 1982.